컨트랙트 업그레이드
이 튜토리얼에서는 이전에 스마트 컨트랙트 뼈대에�서 발행 기능을 구현하기 위해 수행한 작업들을 빌드합니다. NFT를 발행할 수 있는 지점에 도달했지만, 컨트랙트가 지갑이 호출하려는 메서드를 구현하지 않았기 때문에 지갑은 토큰을 표시할 방법이 없습니다.
소개
오늘은 스마트 컨트랙트에 패치 수정 사항을 배포하는 방법을 배우고, 해당 지식을 사용하여 이전 튜토리얼에서 배포한 컨트랙트에 nft_tokens_for_owner 함수를 구현합니다.
컨트랙트 업그레이드 개요
컨트랙트를 올바르게 업그레이드하는 것은 매우 강력한 도구가 될 수 있습니다. 잘못하면 머리가 많이 아플 수 있습니다. 스마트 컨트랙트 코드와 상태를 구별하는 것이 중요합니다. 컨트랙트가 기존 컨트랙트 위에 배치될 때 변경되는 유일한 것은 코드입니다. 상태는 동일하게 유지되며, 이는 많은 개발 문제가 결실을 맺는 곳입니다.
NEAR 런타임은 디스크에서 직렬화된 상태를 읽고 현재 컨트랙트 코드를 사용하여 로드를 시도합니다. 코드가 변경되면 이를 수행하는 방법을 파악하지 못할 수 있습니다.
컨트랙트를 전략적으로 업그레이드하고 런타임이 새 컨트랙트 코드로 현재 상태를 읽을 수 있는지 확인해야 합니다. For more information about upgrading contracts and some best practices, see the NEAR SDK's upgrading contracts write-up.
컨트랙트 수정
지갑이 NFT를 제대로 표시하려면 nft_tokens_for_owner 메서드를 구현해야 합니다. 이를 통해 누구든지 주어진 계정 ID가 소유한 페이지가 매겨진 NFT 목록을 쿼리할 수 있도록 합니다.
이를 달성하기 위해, 이를 몇 가지 더 작은 하위 작업으로 나누어 보겠습니다. 먼저 사용자가 소유한 모든 토큰 ID 목록에 대한 액세스 권한을 얻어야 합니다. 이 정보는 tokensPerOwner 자료 구조에서 찾을 수 있습니다. 이제 일련의 토큰 ID가 있으므로, 함수에서 반환할 JsonToken 객체로 토큰 ID를 변환해야 합니다.
운 좋게도 토큰 ID를 가져와서 nft_core.ts 파일 내 JsonToken을 반환하는 nft_token 함수를 작성했습니다. 짐작할 수 있듯이, JsonToken 객체 목록을 얻으려면 사용자가 소유한 토큰 ID를 반복한 다음 각 토큰 ID를 로 변환하고 목록에 저장해야 합니다.
페이지를 매기기 위해, JavaScript를 사용할 수 있습니다. enumeration.ts 파일로 이동하여 해당 로직을 구현해 보겠습니다.
Loading...
컨트랙트 재배포
Now that you've implemented the necessary logic for nft_tokens_for_owner, it's time to build and re-deploy the contract to your account. Using the build script, deploy the contract as you did in the previous tutorial:
yarn build && near deploy --wasmFile build/nft.wasm --accountId $NFT_CONTRACT_ID
This should output a warning saying that the account has a deployed contract and will ask if you'd like to proceed. Simply type y and hit enter.
This account already has a deployed contract [ AKJK7sCysrWrFZ976YVBnm6yzmJuKLzdAyssfzK9yLsa ]. Do you want to proceed? (y/n)
Once the contract has been redeployed, let's test and see if the state migrated correctly by running a simple view function:
near view $NFT_CONTRACT_ID nft_metadata
This should return an output similar to the following:
{ spec: 'nft-1.0.0', name: 'NFT Tutorial Contract', symbol: 'GOTEAM' }
Go team! At this point, you can now test and see if the new function you wrote works correctly. Let's query for the list of tokens that you own:
near view $NFT_CONTRACT_ID nft_tokens_for_owner '{"account_id": "'$NFT_CONTRACT_ID'", "limit": 5}'
Example response:
[
  {
    token_id: 'token-1',
    owner_id: 'goteam.examples.testnet',
    metadata: {
      title: 'My Non Fungible Team Token',
      description: 'The Team Most Certainly Goes :)',
      media: 'https://bafybeiftczwrtyr3k7a2k4vutd3amkwsmaqyhrdzlhvpt33dyjivufqusq.ipfs.dweb.link/goteam-gif.gif'
    }
  }
]
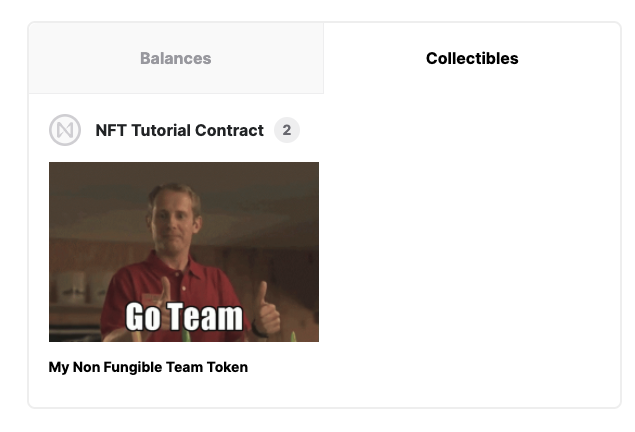
지갑에서 NFT 보기
Now that your contract implements the necessary functions that the wallet uses to display NFTs, you should be able to see your tokens on display in the collectibles tab.

결론
In this tutorial, you learned about the basics of upgrading contracts. Then, you implemented the necessary modifications to your smart contract and redeployed it. Finally you navigated to the wallet collectibles tab and viewed your NFTs.
In the next tutorial, you'll implement the remaining functions needed to complete the enumeration standard.
At the time of this writing, this example works with the following versions:
- near-cli:
3.0.0 - NFT 표준: NEP171,
1.0.0버전

