Getting Started on NEAR Using Windows

In this article, we will cover how to install WSL and setup a NEAR development environment on Windows.
WSL
WSL, or Windows Subsystem for Linux, is a compatibility layer for running Linux binary executables natively on Windows. It allows us to run a GNU/Linux environment directly on Windows without the overhead of a traditional virtual machine or dual-boot setup.
Enable WSL from Windows Features
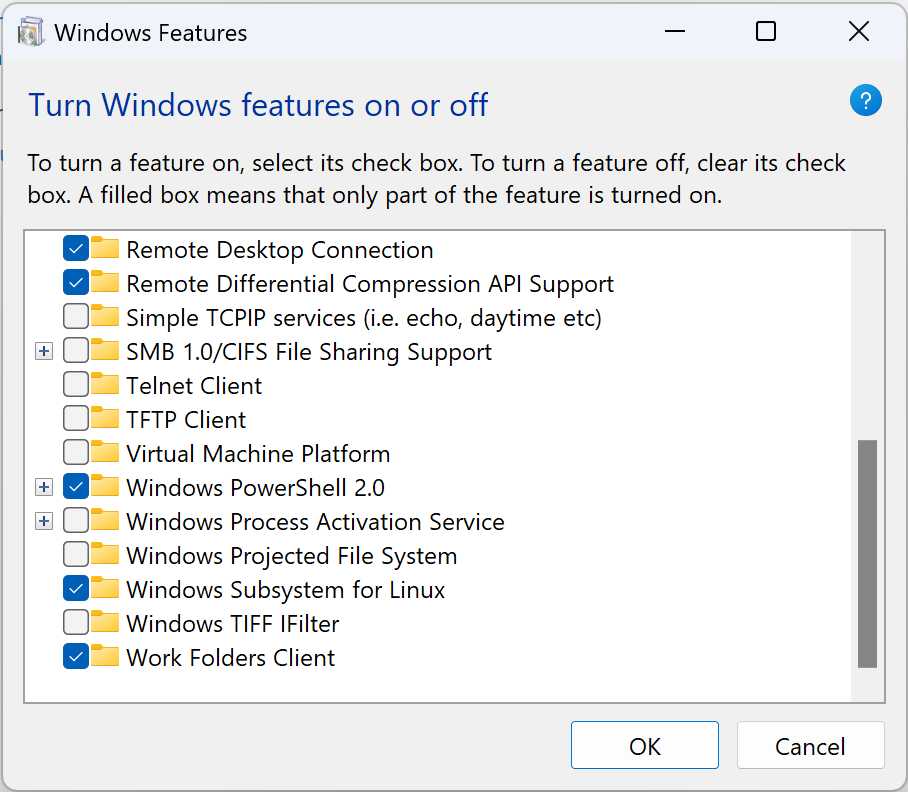
First of all, make sure that WSL is enabled, for this go to:
Control Panel > Programs > Turn Windows Features on or off
Scrolling down will reveal the option Windows Subsystem for Linux. Make sure it is enabled and press OK to confirm (you will be asked to reboot your computer).
Start WSL and Install Ubuntu
Now we will spend some time in either PowerShell or Windows Terminal, which is a modern terminal application that supports various command-line tools and shells.
# may be desirable for seamless integration between WSL2 distros of linux and docker with WSL backend
wsl --set-default-version 2
wsl --install -d Ubuntu
Read more on WSL: https://learn.microsoft.com/en-us/windows/wsl/install https://learn.microsoft.com/en-us/windows/wsl/setup/environment https://learn.microsoft.com/en-us/windows/wsl/
Install Required Packages
Once the installation is completed you will have Ubuntu installed as any other application on Windows. Open it from the start menu and you will be dropped into the Ubuntu bash shell
Enter the following commands to install all the packages that Rust and Node might need later:
apt-get update
apt-get install gcc make libudev-dev openssl pkg-config unzip -y
Depending on your setup, you might need to run the commands with sudo. This temporarily grants your user elevated privileges to perform tasks that require higher permissions.
Setup Developer Environment
Now that we have WSL enabled and running Ubuntu, it is time to setup our developer environment. At NEAR we currently support using JS/TS and Rust to develop smart contracts, and JS/TS to develop web applications.
Below we will explain how to install both Node.js and Rust. If you want, you can install only one of them (e.g. if you are only planning to create a Rust contract, you don't need Node.js). However, we do recommend to install both so your environment is ready if you want to try something different later.
Node (JS/TS)
Node.js is a JavaScript runtime environment that executes code outside a web browser, enabling the development of server-side applications. In NEAR development, it can be used to write smart contracts in TypeScript, as well as to create Web applications that interact with NEAR.
# installs nvm (Node Version Manager)
curl -o- https://raw.githubusercontent.com/nvm-sh/nvm/v0.39.7/install.sh | bash
# download and install Node.js
nvm install 20
# verifies the right Node.js version is in the environment
node -v # should print `v20.14.0`
# verifies the right NPM version is in the environment
npm -v # should print `10.7.0`
Read more: NodeJS Website
Rust
Rust is a programming language known for its safety and performance. It's used in NEAR development to write secure and efficient smart contracts.
Next, we need to add the wasm32-unknown-unknown toolchain. This toolchain is required because the contracts we build will be compiled to WASM to run on the NEAR blockchain.
curl --proto '=https' --tlsv1.2 -sSf https://sh.rustup.rs | sh
# When prompted, press enter for default install options
. source $HOME/.cargo/env
rustup target add wasm32-unknown-unknown
Read more: Getting Started with Rust
That's It
At this point, we are ready to install the relevant tooling and start building on NEAR. Head over to the Quickstart section of the docs for more information or jump right into the examples.